
Color coat and paint are different finish choices.
Here, color-integrated stucco means a traditional cement-based finish with pigment mixed through the finish coat. It does not mean the entire wall is colored. Acrylic finishes can also contain integral color, so ask for the actual product—not just “color coat.”
Cement-based color coat
Natural variation. A mineral finish.
Usually highly vapor-permeable when unpainted. Color and texture develop with the material, application, and curing conditions. Mottling and variation can be part of the appearance.
Repair tradeoff: a patch can stand out against an aged wall, even when the original color code is available.
Painted stucco
Broader color control. A coating to maintain.
Painting a prepared wall area can make color more uniform across repairs. The coating becomes another layer to evaluate when the wall needs to dry or be refinished.
Repair tradeoff: touchups may show; repainting a larger area may be needed for consistent appearance.
Vapor permeability depends on the finish system.
Traditional unpainted cement finishes generally let water vapor pass readily, but some acrylic finishes and masonry paints are also vapor-permeable. Coating chemistry, thickness, and accumulated layers affect drying. Ask for the selected product’s water-vapor transmission data and compatibility with the existing wall.
Vapor-permeable does not mean waterproof. Letting vapor dry through a finish is different from draining liquid water out of an assembly. Flashing, water-resistive barriers, and drainage still matter. See LaHabra’s cementitious/acrylic comparison and Sherwin-Williams’ explanation of paint permeability.
Why an original color code does not ensure an invisible patch
Texture, sand, mixing water, application, curing, sunlight, and weathering influence the result. New material will not have the same history as an older wall. Approve a physical sample under jobsite conditions and decide whether a localized patch or a broader finish area fits your expectations. Our patching and texture-matching guide explains what to include in that scope.
Start below the surface
Stucco doesn’t like to keep its feet wet.
Cement stucco is porous. Persistent contact with damp soil or other wet material can draw liquid water into connected pores through capillary action. Raised planters, soil or paving against the finish, irrigation, and poor drainage deserve attention before the wall is patched or painted.
Older walls and missing weep screeds
Some older homes were built without the drainage termination used in modern framed stucco assemblies. Other walls have a weep screed that is buried, clogged, or not correctly integrated with the water-resistive barrier. Water entering above—or wicking from below—can keep the base wet. Coatings that restrict drying may add to the problem.
Inspect the actual wall before choosing a repair. Stucco over wood framing and stucco bonded to concrete or masonry are different assemblies; adding a weep screed is not a universal fix. The drainage path, flashing, wall base, and surrounding grade need to work together. The U.S. Department of Energy’s water-managed wall guidance explains that system.
Retaining walls: look at the wet side, too
Moisture can move through a retaining wall from wet soil behind it. When water accumulates behind the wall and its depth creates pressure against it, that is hydrostatic pressure. Damp soil or intermittent wetting does not automatically mean hydrostatic pressure. Painting the exposed face does not correct missing drainage or backside waterproofing; ongoing moisture can contribute to blistering, peeling, or finish failure.
Even a coating marketed for masonry has limits. For example, Sika’s Thorolastic-850 guidance excludes backside hydrostatic pressure and rising damp. Resolve the water source and use a system suited to the actual exposure.
White deposits, bubbling, and cracking are clues
Efflorescence is a deposit left when water carries soluble salts to the surface and evaporates. It can point to moisture movement, particularly when it returns after cleaning. The white deposit alone does not establish structural damage or explain every crack. Recurring dampness, loose finish, coating bubbles, or deterioration at the base needs a broader review. See CMHA’s efflorescence guidance and our water-related stucco repair page.
New and existing walls
Why can new stucco crack?
Cement plaster can shrink as it cures and dries. It is also a rigid finish attached to a building that moves. If lumber or wood-based sheathing is installed wetter than its eventual service condition, drying can change its dimensions and transfer stress into the stucco.
That does not mean every new building uses wet lumber or every crack comes from framing. Settlement, temperature changes, joint details, construction loads, and several stresses acting together can also contribute. Poor drainage can keep materials wet and make moisture-related deterioration worse; porosity by itself is not a complete crack diagnosis.
The Plaster Council’s crack policy describes these different stresses, and the USDA Wood Handbook explains moisture-related wood movement. Record whether a crack is changing, where it meets openings or joints, and whether staining follows rain. Then choose a repair scope tied to the condition.
Make the next repair easier
Save the finish information—and usable material.
At handoff, ask whether keeping a few unopened bags from the same batch—and, for field-colored products, the matching unopened color packs—makes sense for near-term repairs. Keep original labels and packaging. Store material dry, protected, and off the ground or concrete. An additional airtight, moisture-resistant bag or sealed container can help protect it.
Cement-based products have a shelf life even when unopened. Follow the exact product’s storage instructions and expiration limits; do not assume a dry-looking bag is still usable. Ask the manufacturer before using damp, hardened, or expired material. Keep a cured sample and records for longer-term reference.
For example, Omega’s ColorTek data sheet specifies storage and shelf-life limits. Check the sheet for the product actually used on your wall.
Your finish record should include
- Material: manufacturer, product, base, color name and code, color-pack formula or ratio, and batch/lot numbers.
- Appearance: aggregate, texture, approved cured sample, and photos in natural light. A phone photo is not a color standard.
- Application: installation date, installer, wall areas, and any primers or coatings already present.
- For painted stucco: paint and primer brands/products, color formula, sheen, and coating records.
- Stored material: bag labels, purchase date, storage location, and manufacturer shelf-life instructions.
Spare material helps preserve the specification. It cannot reproduce years of weathering on the surrounding wall.
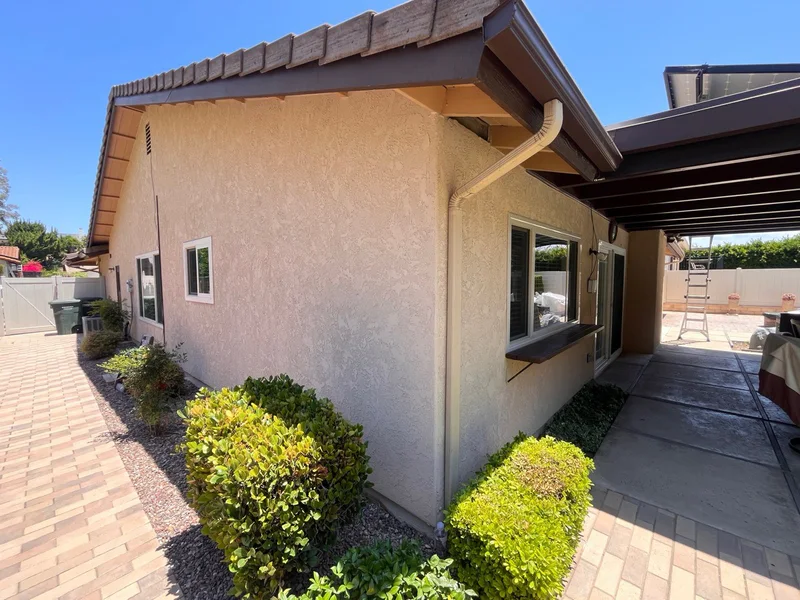
Documented AWC work
See a color-integrated finish in context.
Our rear-wall resurfacing case study shows the finish alongside the preparation and repair scope.
View the project →Keep learning before choosing a scope.
The manufacturer and technical references linked above support the material guidance. The right product still depends on the existing assembly and site conditions.
- Official LaHabra and Omega color chartsShortlist a color, then confirm it with a physical sample.
- AWC: Patch, recoat, or restucco?Compare what each option changes before deciding on a finish.
- AWC: Why the finish may not be the source of a crackKeep the visible symptom and its possible causes separate.
Learn from Kirk Giordano’s jobsite demonstrations
For a closer look at the craft, these independent jobsite demonstrations from Bay Area plasterer Kirk Giordano show real application and repair considerations. Use the current product instructions and your wall’s details when choosing a repair.
- Color-coated stucco, paint, and darkening when wetA field demonstration of how finish choice affects surface behavior and appearance.
- Why stucco drip and weep screeds matterA jobsite look at drainage at the bottom of a framed stucco wall.
- Matching fine stucco texturesHow sand and application technique affect a patch’s appearance.